When deploying a Palo Alto firewall for the first time, one of the most important steps is configuring the management interface IP address. The management interface allows administrators to access the firewall via SSH, HTTPS (WebGUI), and other management services. Below are the steps to Configure Management IP on a Palo Alto Firewall Using CLI.
Why Configure the Management IP?
The management interface is a dedicated interface used exclusively for firewall administration. It is separate from the data interfaces that handle production traffic.
Configuring the management IP allows you to:
- Access the firewall using SSH
- Log in to the WebGUI
- Connect to Panorama
- Perform system administration and troubleshooting
Prerequisites
Before configuring the management IP, make sure you have:
- Console access to the firewall
- Administrator credentials
- The following network information:
- Management IP address
- Subnet mask
- Default gateway
- DNS servers (optional)
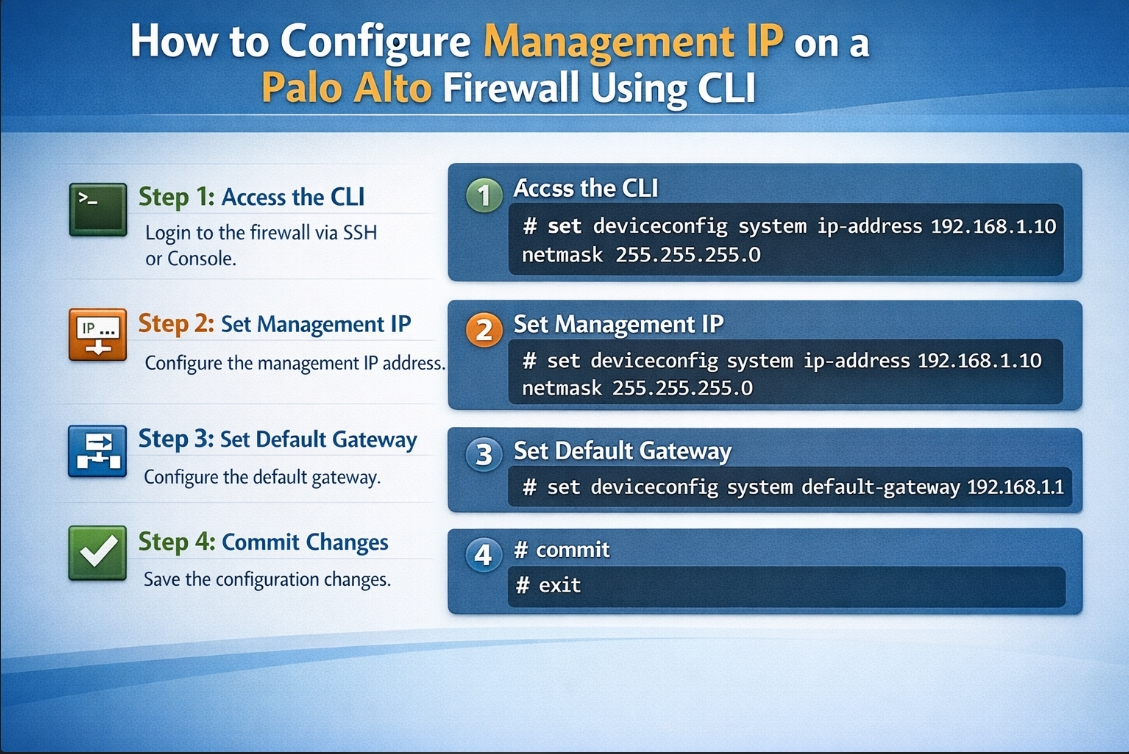
Step 1: Log in to the Firewall via CLI
Connect to the firewall using console cable or SSH.
Login to the paloalto firewall with the default username and password (admin/admin).
After login, you will see the operational mode prompt:
>
To configure settings, enter configuration mode:
configure
The prompt will change to:
#
Step 2: Configure the Management Interface IP
Run the following command:
Change the system setting to static (DHCP is enabled by default)
set deviceconfig system type static
set deviceconfig system ip-address <ip address> netmask <netmask> default-gateway <default gateway>
This command assigns:
- Management IP
- Subnet mask
- Default gateway
Step 3: Configure DNS Server (Optional but Recommended)
To configure DNS:
set deviceconfig system dns-setting servers primary <DNS ip address>
You can also configure a secondary DNS server:
set deviceconfig system dns-setting servers secondary <DNS ip address>
Step 4: Commit the Configuration
Changes in Palo Alto firewalls do not take effect until you commit them.
Run:
commit
Wait for the commit to complete.
Step 5: Verify the Configuration
Exit configuration mode:
exit
Then verify the management interface settings:
show interface management
You should see output
Access the Firewall via Web Interface
Now you can access the firewall using a browser:
https://<ip address>
Log in using your administrator credentials.
Leave a Reply